Monday, December 28, 2009

Organic Ribbon Blanket Tutorial

I just made this little baby ribbon blanket. I'm going to attempt my first simple tutorial for it - partly so I can remember exactly what I did so I can make lots more of these ;) It's a great little gift to give for newborns, not only because babies enjoy these little ribbon blankets, but it's also incredibly fast to make (this one took me half an hour including taking photos) and very economical (this one cost about $5 in ribbon and $2 in fabric.


FABRIC REQUIREMENTS:
* 2 13" square pieces of soft fabric - I used this organic sherpa fabric from Wazoodle. The sherpa is very thick and a bit stretchy, so it's somewhat difficult to work with. It's amazingly soft (and thick), though, so I think it'll be perfect for these. Another option is thick flannel. You can get inexpensive 8oz flannel at Organic Cotton Plus. If you only have one yard of fabric, you could cut 12" square so you can get three squares along the yard-length side.
* 20 4.5" pieces of ribbon - I used this 7/8" wide organic ribbon from Near Sea Naturals. You could also get undyed from here and dye yourself with Kool-Aid or plant dyes. Just be sure to wash a few times in hot afterward to be sure the dye is completely set!
* Thread - I used this organic thread from Near Sea Naturals. It's a pleasure to work with!


DIRECTIONS:

1. Cut fabric and ribbon.


2. Attach ribbon with pins to the RIGHT side of the fabric - I attached the middle ribbon on each side 2" apart with the middle one at the 6.5" mark - so they were placed with middles at 2.5", 4.5", 6.5", 8.5" and 10.5".
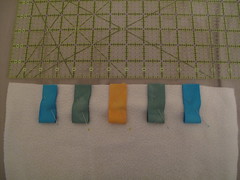


3. Baste with 3/8" seam allowance (I needed 3/8" because it's thick fabric - with thinner fabric you could do 1/4" baste). If you're a perfectionist, it's worth spending a little extra time here so your ribbons end up straight - a few minutes here makes the finished product look a lot more professional. If you don't care too much, you can skip this step.


4. Pin right sides together. I put in two black head pins 3" apart in the middle of one side to remind me to leave an opening to be able to turn the blanket right side out. I like the gap to be in the middle of a side rather than at a corner to make the final pinning and topstitching a little easier.


5. Make sure all ribbons are INSIDE and sew together with a 1/2" seam allowance leaving a 3" opening to turn blanket right side out.


6. Trim corners and turn blanket right side out. I was able to pull out the corners with my fingers, but depending on what fabric you use, you might need a tool such as a chopstick or knitting needle to push the corners out.


7. Iron and fold in the 3" opening and pin closed.
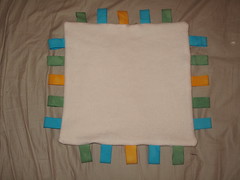


8. Topstitch. I did this with a 3/8" allowance because my walking foot edge is at 3/8", so I get the straightest results at 3/8" :) Also, the sherpa is very thick and difficult to stitch much closer to the edge. You can use any amount up to about 3/8" - you just want to be sure you stitch close enough to actually sew up the folded/pinned area.


ENJOY! If anyone makes this from my tutorial, please let me know! It's my first tutorial, so if there's anything that's not clear, let me know!

Ribbon Blanket


I made a Ribbon Blanket today. I tried to match the style of this one. I really like how it came out - this will definitely be a standard baby gift from now on for me! I used organic sherpa fabric from Wazoodle with organic ribbons and organic thread from Near Sea Naturals. I figure if it's something a baby is going to chew on, it should be 100% organic! I love the feel of the sherpa, but it was hard to work with even with a walking foot. I think it would be impossible with a standard presser foot. I did 1/4" seam and then did again at 3/8" to reinforce, but next time I'm going to do 1/2" seam the first time so it'll be easier to get straight. I cut the sherpa 14" square to begin with, which seems fine and the ribbon I cut 4" based on this tutorial, but she did 1/4" seam allowance and with the sherpa, you really need more (or at least I do). So next time I'll cut the ribbon 4.5" long. I'm going to make one more tonight with my modifications and post pics of both when I'm done.

BTW, the organic thread is amazing. I LOVE using it. I don't think I'll go back to regular cotton. I'll have to order a bunch more so I have a supply since Near Sea Naturals is the only company that I can find selling it :)

Wednesday, December 9, 2009

Knit Socks


So I'm very happy with what I just took off my needles - a beautifully hand-dyed wool sock for Y. I got the yarn 2+ years ago through a coop and had it dyed by the woman who ran the coop. At the time, I was spending far too much time oogling over hand-dyed yarn and I picked the color scheme and she matched it so well! It's Purewool yarn and the pattern is Yankee Knitter Designs Classic Socks, Pattern #29. It's slightly big, but I guess that's fine since that way they'll definitely fit comfortably through the winter and hopefully even next year. So now one to go. I'm loving knitting with this yarn.

Sunday, November 8, 2009

Sweet and Spotty Needlecase


I'm making Natalie Lymer's adorable Sweet & Spotty Needlecase. I finished all the embroidery. Unfortunately I used two slightly different DMC threads - one is slightly darker than the other. I didn't even realize but the second I showed Yoav he mentioned it. Of course, he's so sweet he said he liked it with the two colors and I can barely tell and it's a project for me anyway, so I'm just going to leave it. If it were a gift, I'd probably fix it. Also I did all the inside flowers Laisy Daisy stitch instead of Satin because I'm lazy :) No, actually it's just because I don't like doing satin stitch. I need a Pigma Micron Size 1 pen to get it a little better - my lines were a bit thick which makes it hard to do perfect embroidery. I used a water soluble fabric pen, which was quite thick, but at least it completely erases at the end, which is nice for people who don't do perfect embroidery ;)

Saturday, October 17, 2009

Hat for Y

102710

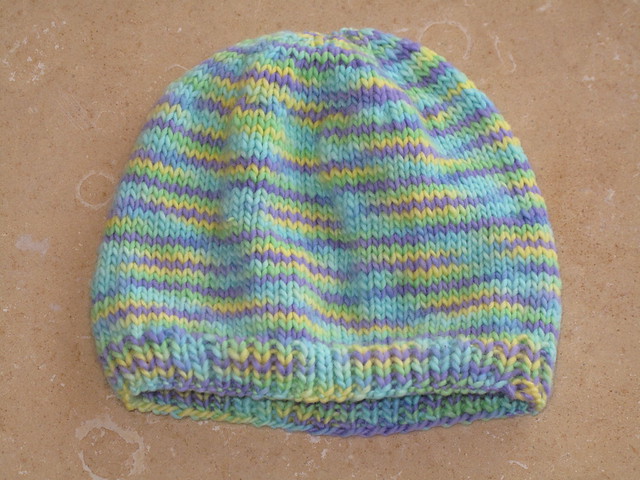
I finished Y's hat today.  It's with my new Three Irish Girls yarn; pattern is Knitting Pure and Simple Basic Hat and Mitten Set for Children; #8 needles.  He is very happy with it - hopefully it'll be comfy for him when he wears it for long periods.

Wednesday, October 7, 2009

Finished: D9P Doll Quilt


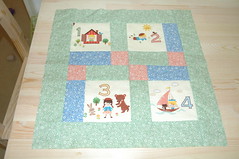
I finished this little doll quilt for Y. I have to say I had SO much fun making it and I love how it turned out. I used this tutorial for the D9P (Disappearing Nine Patch), but as I said before, I generally like more ordered quilts, so I came up with this - I did the four numbers from a Japanese Cosmo fabric, the flowers are all Windham Story Book fabric - I started with blue in the top middle square and bottom middle square, green in the left and right middle squares and pink in the middle. The back is a yummy natural colored organic flannel. Hopefully it won't get too dirty. It'll be really soft for the dolls LOL. And I used a thin bamboo/cotton batting. I quilted it with stitch-in-the-Ditch. Last time I did stitch-in-the-ditch was with a little nine-patch quilt so I didn't have to start/stop, just stitched end to end. This time with the border, I had to do some starting and stopping, which I did by setting the stitch length to 0 and doing a few stitches in place to secure the stitching. Binding I used a pre-made double fold bias tape. I thought it would make it much easier since I wouldn't have to make it, but it was a bit thin and stretchy and hard to work with. I like making it myself better. I'm going to try to get a label on one of the days using this tutorial. I just need to get some freezer paper.

I entered this little quilt into a Virtual Quilt Festival hosted by Amy of Park City Girl. It's really fun to look through the quilts for inspiration! Thanks Amy for hosting this!

And I figured out a great trick to offset the late-night sewing! I listened to an Aldort CD (the Raising Competent Children one, always a favorite for me) as I was doing the hand stitching for the binding, so I woke up revved up for a fully-connected day which seems to be really and truly offsetting the sleepiness. Oh, and the cup of coffee :)

Tuesday, October 6, 2009

DNP Doll Quilt Top


So Y wanted me to make him the random quilt, but it's not quite right for me - I only have one yellowish Story Book fabric, so there's three big pinks, one big yellow and two big greenish ones - I want to order some more fat quarters so I can mix it up better before I make it. So, meanwhile I spent hours searching for a pattern I liked and wanted to try. I'm falling fast for this quilting stuff! I really want to try different types of blocks. The doll quilts are perfect for learning. I found this tutorial. I love the way her quilt looks, but I don't have enough of the Story Book fabric to have nine squares that would look good in this format. So then I came up with a layout that I love! The quilt top is done, just gotta sew on the back. I turned the squares just the way the woman did in the tutorial, so the 2 and 3 both started out turned ninety degrees - so the tops of the numbers were to the right.

Saturday, October 3, 2009

Done with Doll Quilt #1


All done! This is for my niece, K.

Done with Doll Quilt #1


All done! My sister liked the ordered one best and this one is for my niece. I'm going to make the random one for Y. Thanks to everyone who voted! I don't like the random one as much so it helps to see that other people like it before I make it - that's the one Y wanted and he did most of the layout. The tutorial is here.

I have to say, I LOVE having a sewing room. Sewing is SO much faster and more fun now! This was my first time turning on the sewing machine - I had to bring the transformer from the kitchen. I plugged the sewing machine and iron into the transformer and put the iron on a small wooden table perpendicular to the sewing table with a piece of insul-bright and dishcloth on top, so I could easily iron after each step. In my apartment, ironing meant I had to get up and walk into the kitchen where I had the iron set up, so I wasn't as good about ironing in between each step. And before I barely had any space on my table, so as my sewing fabric went behind the machine, it would bunch up and knock into all the other things I was using. Now I actually have space on my table for the cutting mat and rotary knife on the left half of the table and sewing machine on the right and plenty of space behind the machine for the fabric. I LOVE it!! Oh, did I say that already??? I'll take pics of the sewing room in action another day. Quite a pleasure. I have a feeling I'm going to be spending a lot more time sewing now :)

Wednesday, May 13, 2009

Doll Quilt for my niece


I finished my doll quilt for my niece. I must say that I love it :) The basic idea was from this I-Spy quilt. I couldn't deal with the randomness of a quilt like that, so I decided to make an organized I-Spy quilt with the "Hello My Friends" line of fabric from Cosmo Textiles. The front is Hello My Friends and a blue/white dot fabric (Caramel Town line from Lecien). All the fabric was from Superbuzzy.com. The back is a different Hello My Friends pattern, but with the same little characters. I used this tutorial for the binding, which was really clear and came out perfectly IMHO :)

Wednesday, January 28, 2009

Coaster - Basic Quilting


1/27/09
Originally uploaded by jmilikow

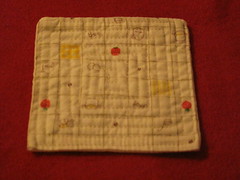
So I finished my first super basic quilting project. Well, not project even LOL. I made a coaster. Maybe doesn't seem so exciting, but I had to use a walking foot, which I'd never heard of until I started reading about quilting. The pattern is from "Last Minute Patchwork & Quilted Gifts" (which is a beautiful book - it was a gift from my sister for my birthday). The fabric is "Ingredients" by Lecien. I did the stitches that go around and around in concentric squares. They're not perfect, but they're fairly close to it. I'm going to make six as a housewarming present for my cousin - I think I'll get more used the the quilting guide on the walking foot as I do more. It's really cute and I'm very happy with it.

Tuesday, January 13, 2009

Knitting Needle Case


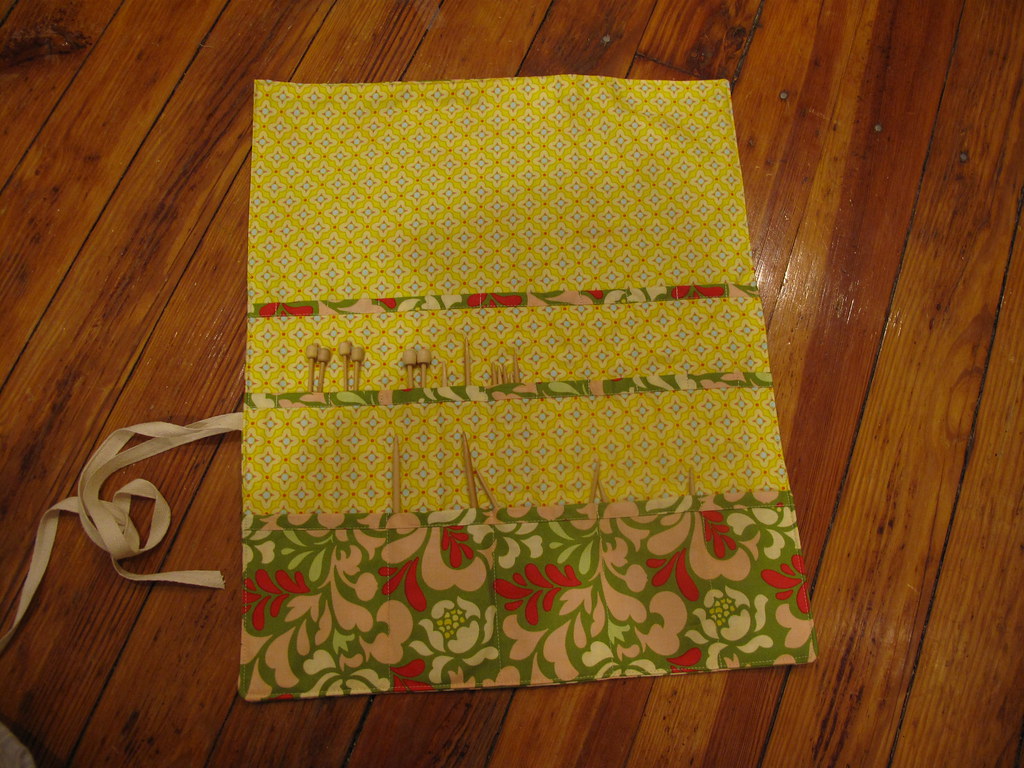
I just finished sewing this knitting needle case. I LOVE it. It's a gift for my SIL.

The pattern is here. The fabric is Free Spirit by Heather Bailey. It's not my favorite fabric, but I was trying to find something my SIL would like, not just my favorite. In the end, it's probably not ideal for either, but I'm pretty happy with it. I can't wait to pick out fabric to make one for me now!

The only modification I made to the pattern was to come in 1.75" instead of 2" on the right when making the lines because it seemed like (correctly IME from the finished product) there otherwise wouldn't be enough space on the left. I tested a little and see that the top row is really for 14" needles - smaller needles can fall down into the pocket. I don't use any 14", so for mine, I'll stitch a bottom to the rows about 8" down for the first row and a little less for the second row - I'll have to see what length my DPNs are and I'll make the bottom for the second row about an inch less than them. The bottom row is fine for me - it's for circular needles and notions. It also needs to be 1.5" wider for it to come out perfectly. My left column is only .75" and right column is 1". So I'll make that adjustment too. My ribbon is 100% linen and is 1 yard long.