
FABRIC REQUIREMENTS:
* 2 13" square pieces of soft fabric - I used this organic sherpa fabric from Wazoodle. The sherpa is very thick and a bit stretchy, so it's somewhat difficult to work with. It's amazingly soft (and thick), though, so I think it'll be perfect for these. Another option is thick flannel. You can get inexpensive 8oz flannel at Organic Cotton Plus. If you only have one yard of fabric, you could cut 12" square so you can get three squares along the yard-length side.
* 20 4.5" pieces of ribbon - I used this 7/8" wide organic ribbon from Near Sea Naturals. You could also get undyed from here and dye yourself with Kool-Aid or plant dyes. Just be sure to wash a few times in hot afterward to be sure the dye is completely set!
* Thread - I used this organic thread from Near Sea Naturals. It's a pleasure to work with!
DIRECTIONS:
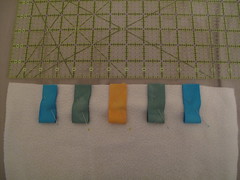
1. Cut fabric and ribbon.
2. Attach ribbon with pins to the RIGHT side of the fabric - I attached the middle ribbon on each side 2" apart with the middle one at the 6.5" mark - so they were placed with middles at 2.5", 4.5", 6.5", 8.5" and 10.5".
3. Baste with 3/8" seam allowance (I needed 3/8" because it's thick fabric - with thinner fabric you could do 1/4" baste). If you're a perfectionist, it's worth spending a little extra time here so your ribbons end up straight - a few minutes here makes the finished product look a lot more professional. If you don't care too much, you can skip this step.

4. Pin right sides together. I put in two black head pins 3" apart in the middle of one side to remind me to leave an opening to be able to turn the blanket right side out. I like the gap to be in the middle of a side rather than at a corner to make the final pinning and topstitching a little easier.
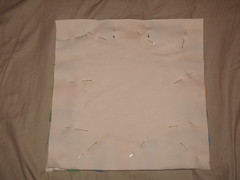
5. Make sure all ribbons are INSIDE and sew together with a 1/2" seam allowance leaving a 3" opening to turn blanket right side out.
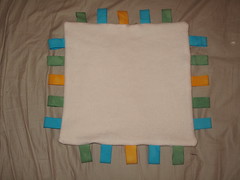
6. Trim corners and turn blanket right side out. I was able to pull out the corners with my fingers, but depending on what fabric you use, you might need a tool such as a chopstick or knitting needle to push the corners out.
7. Iron and fold in the 3" opening and pin closed.
8. Topstitch. I did this with a 3/8" allowance because my walking foot edge is at 3/8", so I get the straightest results at 3/8" :) Also, the sherpa is very thick and difficult to stitch much closer to the edge. You can use any amount up to about 3/8" - you just want to be sure you stitch close enough to actually sew up the folded/pinned area.
ENJOY! If anyone makes this from my tutorial, please let me know! It's my first tutorial, so if there's anything that's not clear, let me know!
