Monday, October 25, 2010

Nature Bag

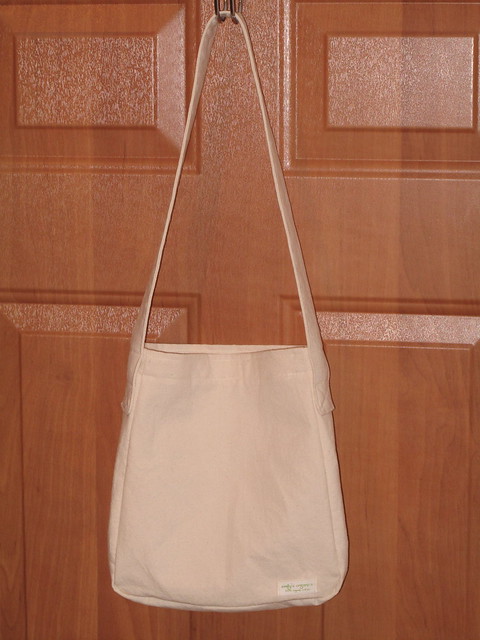
I made this little bag for Y last night (another birthday gift).  The pattern is from "Linen, Wool, Cotton" by Akiko Mano; fabric is organic cotton from Organic Cotton Plus.  I'm hoping Y will be as happy with his.  He often asks me to hold his nature bag (which is like a standard canvas bag with two handles, but his is thin cotton) while we're in the forest because it's hard for him to balance and climb while holding onto the bag.  This bag is designed as a messenger bag with only one strap, so it's to be worn over his neck.  I'm adding some embroidery that I'll finish tonight - his name and some elements from the Cinderberry Stitches' precious Sweet & Spotty Needle Wallet.

The bag:
102610

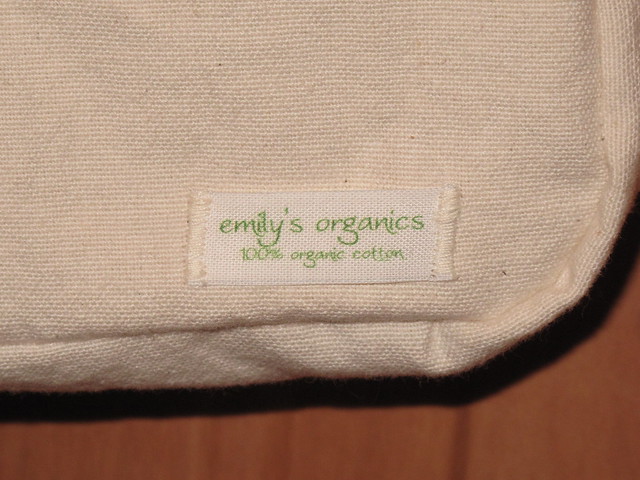
My (organic) "Emily's Organics" label that I got from greenbeanstrings on Etsy:
102610

Finished photo (with embroidery) coming soon!

Saturday, October 16, 2010

Stockmar Block Crayon Roll

1/17/10

102610

102610

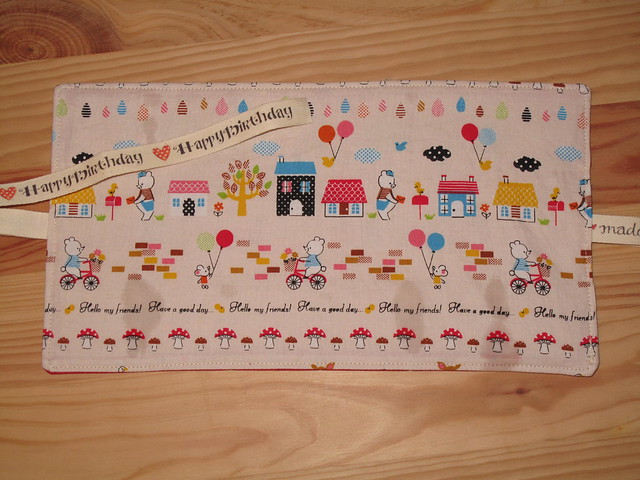
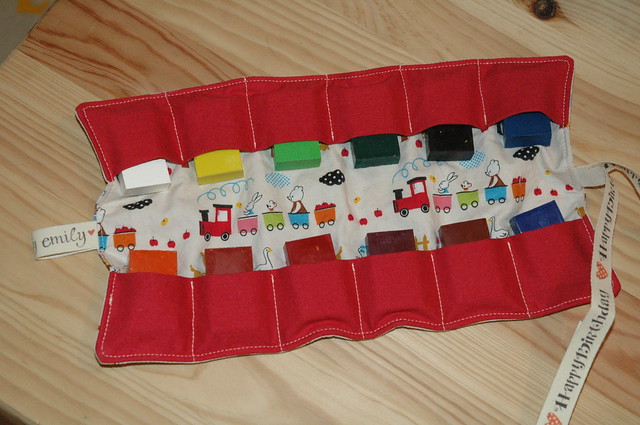
I just finished this crayon roll for Y's birthday.  It can hold 12 Stockmar block crayons.  Disregard the water marks - I used a water erasable pen for markings... 

Measurements:
Outside fabric, inside fabric and interfacing fabric:  6.5" x 11.25"
Red fabric (two pieces):  4" x 11.25" (folded in half lengthwise before sewing to the inside fabric)
Ribbon:  20" (this time I used ribbon from Lillalotta).

Directions:
1.  Cut all fabrics
2.  Iron interfacing to wrong side of inside fabric
3.  Fold crayon-holding fabric (my red fabric) in half lengthwise and iron.  Pin in place (fold is toward the inside of the crayon roll).  Make a vertical mark at 2.125" from the left edge, then four more markings every 1.75".
4.  Stitch along markings, going back and forth a bit at beginning and end.
5.  Fold ribbon in half with pattern on the INSIDE and topstitch to right side of inside fabric.
6.  Pin ribbon to the inside fabric so you don't accidentally sew over it.
7.  Place right side of outer fabric to right side of inner fabric and sew with 1/4" seam allowance, leaving a 3.5" hole for turning right side out (I left hole at short end on the side without the ribbon).
8.  Trim corners and turn right side out.
9.  Poke out corners with a knitting needle or similar, iron and topstitch 1/8" all around.
10. Insert crayons and enjoy!
Tuesday, October 5, 2010

Knitted Gnome

100510

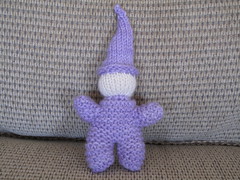
How cute is this little gnome!?!??! I used this free pattern - THANK YOU Tonya! It is such a fun pattern - just took me an afternoon (with interruptions) and Yoav stuffed it and sewed the arms on (you can't tell that he did it versus me - I was surprised he was able to do it so well with no tips!) The wool is Purewool. I definitely will be making more of these - it's easy, quick, fun to knit, and the finished product is adorable!!

Monday, August 30, 2010

Knit Hat for ME!


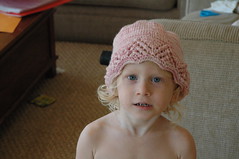
Just finished this hat for me. I love how it came out. I made one for a friend's daughter using the exact pattern recently (it's from Louisa Harding's "Hats, Gloves, Scarves" book). I modified the pattern for DPN needles and added an inch to the length, so it covers my ears and doesn't have a seam, so I like it much better for me than the original pattern. The yarn is Purewool 100% merino wool.

Monday, July 5, 2010

Baby Blanket


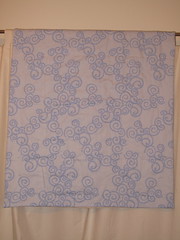
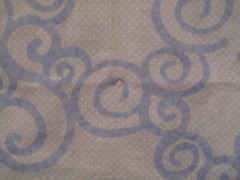
Just finished this little baby blanket. The pattern is from "Last Minute Patchwork and Quilted Gifts" by Joelle Hoverson. The front fabric is Harmony Art Silent Stumps (organic cotton), backing is 4.5oz organic flannel (front and back from Organic Cotton Plus); batting is organic cotton and thread is organic thread from Near Sea Naturals, so it's truly a 100% organic blanket :) I love how it turned out - the fabric is so soft and the pattern is gentle and the colors are lovely - perfect for a baby blanket!

The blanket is a lot harder than it looks because it has 99 (!) little satin stitch ovals to hold the batting in place. Next time I'll make them 4" apart instead of 3.25" so I don't have to do so many. It's important to start the ovals from the center of the blanket and smooth the blanket as you move outward or you get lumps of fabric between the ovals...

Another difficulty was that I made a mess cutting the flannel - I was listening to a podcast and ended up cutting the fabric three times and still didn't get it quite how I wanted, but the final size is fine. It ended up 31x38" (final blanket).

Yoav helped pick out the fabric, although he actually preferred Harmony Art Whispering Grass, which I think is too shimmery - I actually have no idea what to do with it, but that's another story... He also helped cut the fabric (not while I was listening to the podcast).

Wednesday, June 23, 2010

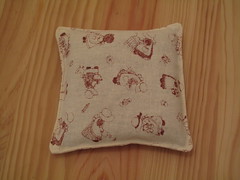
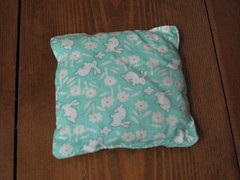
Flaxseed Boo Boo Bag


Just made a little flaxseed "Boo Boo Bag". I love it. I've been wanting to make one of these for a long time. I love the feel of the flax and the size seems perfect. It's 4.5"x4.5" finished - a little bigger than the beanbags so we don't get confused. The fabric is "Sunbonnet Sue" linen/cotton blend. The fabric is so sweet - the fabric alone is enough to cheer you up - I got it for an apron I made my niece. Sunbonnet Sue is a classic quilt block that originated in the late 1800s. I once saw a beautiful Sunbonnet Sue quilt on exhibit in NYC. You can read more about her here.

A flaxseed Boo Boo Bag can be stored in the frezer and used like an ice pack. Flax lasts a long time and has high oil content so it holds the cold longer than other grains (and doesn't drip like the actual ice cube Boo Boo Bag Yoav made recently LOL). For reference, these are filled with 4oz flax.

Sunday, June 6, 2010

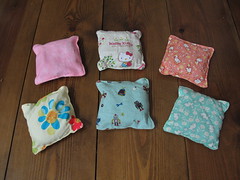
Beanbag / Tutorial

My sister asked me to make some beanbags for her girls. I've made a few beanbags for my kids in the past, but an OT my sister knows added a few key elements:
* Fill the bags with rice (not beans as I've done in the past)
* Put the rice first in sewn up stocking feet so if the bag tears or a seam rips, the rice won't end up all over the floor (of course, the rice is all over the floor of my sewing room due to the oh-so helpful nature of my two Helpers, so the stockings don't help much on that end )
* Fill the bags "pretty full" of rice, so they make a good thud when dropped on the ground.

They came out GREAT! The kids love them - they've been throwing them back and forth to eachother - it's so cute watching E learn how to keep his hands together to catch. We're going to be making a LOT more of these!


SO... here's my non-visual tutorial:
1. Let the kids choose fabric - what a joy for them, and not so stressful for me, since they were only choosing small pieces;
2. For each fabric, cut 2 4"x4" pieces
3. Iron fabric
4. Fill stocking foot with 2.5oz sushi rice (this rice seems perfect b/c it's a very small grain, but any small grain would do)
5. Sew up stocking foot - be careful not to catch it on a fingernail or the stocking will get a tear in it and defeat the purpose - I wonder if it might actually be better to use little baby/toddler socks instead since they'd be stronger - I'm going to try that on a bean bag and update these instructions if it works...
6. With right sides together of fabric, sew with 1/4" seam, leaving about 1.5" in the middle of one side for putting in the rice bag;
7. Trim corners, turn inside out, poke out corners with a knitting needle or sushi stick or similar...
8. Tuck in the little 1.5" section of fabric that wasn't sewn up yet.
9. Iron
10. Put in bag of rice
11. Topstitch all around
12. Cut any hanging thread


Update:  If you don't mind the risk of rice all over the floor, a much easier method is to skip the stocking and fill with 3oz rice (instead of 2.5oz).  Better if you have a child looking over your shoulder waiting for said beanbag ;)

Wednesday, March 31, 2010

Baby Quilt Design

I've been totally off the sewing wagon for months I think. I've been trying to focus on our rhythm, food and, of course, the holidays...

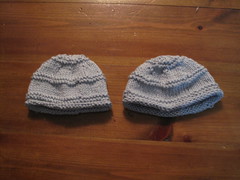
Meanwhile, I'm missing the sewing. I've been knitting, which helps, but it meets a different need. I like to knit while the kids are playing. That way, my Presence is felt, but I'm not involved in the play. It's perfect. And it's very calming for me, especially to do simple projects with natural yarns. I just finished these little hats for my nephews who are due in May and June. I used Blue Sky Alpacas organic cotton, my favorite yarn to knit - I love the way it feels between my fingers as I knit.

I just finished these little hats for my SILs who are both due with boys in the next two months! Note that one is much bigger than the other even though I used the same newborn pattern for each - that's what happens when Yoav sees a cute baby hat and decides to attach a string to go under the neck and try to get it on his own head! Oops. So no longer newborn, but still for a baby ;)


There's a baby blanket I really want to make from the Louisa Harding book as well. Of course I have the problem of where to buy the yarn. I found this online yarn store that has organic cotton yarn, but I'll probably get some o-wool balance (blend of organic cotton and wool) for the blanket.

Anyway... So as much as I love knitting, I'm missing sewing. Last night I started thinking about making a baby quilt for either a SIL or a friend who's due in June. I really love thinking about how to put the fabrics together and quilt patterns. I had been thinking about making myself a skirt, which would probably take me no more than an hour or so, but I find myself drawn to quilting. I feel like sewing clothes is more "productive", but there's also the issue of my mental health and since I find peace in quilting, I'm going to try going back to that for a bit. Clothes are so cheap these days, it's not even worth making your own clothes unless you enjoy it.

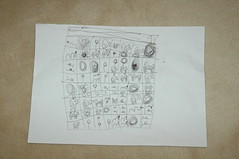
So.. I designed a baby quilt and planned out the fabrics. On my hand-drawn pattern, the blue represents the turquoise polka dot pattern fabric and the green is the greenish polka dot. Then the inside squares will be the bird fabric and mushroom fabric. The striped fabric will be the border. The fabric is Cloud 9 organic cotton that I purchased on Etsy from Modern Organic Fabrics (I highly recommend it - the woman who runs the shop is really nice and offers free shipping and even said she's split up shipments for me in $50 increments since I get hit with customs tax for imports over $50).
Here's the pattern and fabric plan:


I'm hoping the kids will fall asleep at a reasonable time today so I can start cutting. Jeremy is in NY, which means I can make a simple dinner and have less clean-up...

How cool is it that the boys are upstairs playing together while I wrote this?!??!? :)

Wednesday, January 27, 2010

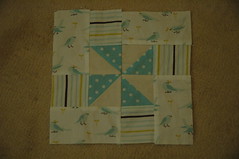
First Block of Pinweel Baby Quilt


I made a trial block for my baby pinwheel quilt. The pattern is from "Material Obsession" by Sarah Fielke and Kathy Doughty. It was a birthday gift from my SIL and has several beautiful patterns and some helpful tips in the back. I might do another test block because the white inside the pinwheel is actually off-white/natural and it bothers me :( I don't have any white fabric :( For some reason I thought I only needed natural color, since i prefer it, but if I need to match to white, I guess I need white :( I might have to cut the rest and order some white. We'll see. Anyway, the fabric is from the Cloud 9 Organic collection - I got it all on Etsy from ModernOrganicFabrics.

Update: I just found some organic white Michael Miller fabric for $7/yard, so I'll get everything cut and wait for that...

Monday, January 25, 2010

Knit Pilot Cap


Here's the pilot cap I made for E. It's the Little Turtle Knits pattern and Purewool yarn (the wool was dyed specially for me). I loved the pattern - very clear and easy to follow and the hat is so cute. I'm now making two more for my coming nephews. And maybe one for a friend who's having a girl... It probably won't get worn much, though. The doll was my only willing participant for the photo...

Wednesday, January 13, 2010

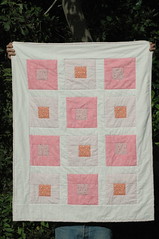
Completed Square in Square Baby Girl Quilt!


I finished the quilt! I love how it turned out, especially since I just used fabric from my stash, and girly prints at that, which I don't have much of. I think the duck fabric is a little too orange, but it's close enough to work. I used this tutorial and I stitched in the ditch to quilt it - I stitched around each big block and around each smaller one inside.

For my next baby quilt, I want to do this same pattern, but no offset blocks - just all centered. I also want to add another border like on this quilt. And I want to make the back nicer, with a bit of patchwork using fabric from the front.

I had so much fun with this - I'm dreaming of all the future quilts I can make - and hopefully NOT on such a tight timeline - that's the only part that's not fun...

Friday, January 1, 2010

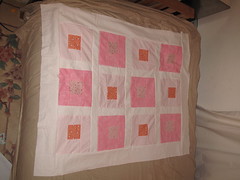
Square in Squares Baby Girl Quilt


I got the crazy idea to make a quilt for a friend who had a baby. It started because I have two friends who had baby girls and only enough girl-colored ribbon to make one of the little ribbon blankets, so, practical woman that I am, I started on a quilt :)

I'm actually amazed how fast I've been able to do it. With the help of chain stitching and setting my machine on the fastest speed , I've gotten pretty fast sewing pieces together. The slowest part for me is actually the cutting. I do NOT have good technique with cutting. I'd love a bigger cutting mat - mine is 18"x24", which is great for small projects, but too small for quilting. Although also it's on a desk - it'd probably go better if I just set it down on a hard floor.

I don't have much girl-y fabric, so I did the best I could. I'm pretty happy with the way it looks and love the basic design. I have some beautiful organic fabric I want to do a similar quilt out of. I used this tutorial.


Yoav helped me with the design and fabric choices. He got into the design process and designed one himself :) My design is (obviously on top - just included for comparison) and then his is below.