Tuesday, August 16, 2016
Quilt Block Pillowcases
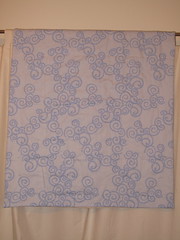
I made pillowcases to match S's quilt, which now sits at the bottom of her bed for decoration. The blocks were already made when I made the quilt, because I was considering making the quilt larger, so the pillows were relatively easy to make. I used extra fabric that I have from the quilt - all organic fabric from Cedar House Fabrics.
The quilt block designs are from a Red Pepper Quilt design - the Quilter's Palette Quilt. I was VERY happy with the pattern and love all of Rita's quilts! It is my favorite quilting blog.
The pillowcase inspiration is from here and I used her tutorial for the envelope pillowcase. My pillow inserts are 50cmx50cm (from IKEA).
Tuesday, May 19, 2015
Scrunchies
These are great to make for little gifts. They are crocheted around a hair band. I used Knit Picks 100% cotton Dishie Solids.
Friday, February 14, 2014
Dishcloths
These are little dishcloths I made to use as napkins. I used 100% cotton yarn from KnitPicks. The pattern is called Grandmother's Favorite Dishcloth :) They were fun to knit up!
Friday, December 27, 2013
Rainbow Nesting Bowls
I really love how these came out and they were relaxing and meditative to make.
I used Knit Picks 100% cotton Dishie Solids. The free pattern is here.
Thursday, November 14, 2013
Crochet Baby Rattle
I really love how this came out. I used two little bells inside the big loop, which are very muffled, but at least something. I probably won’t make more, but only because it was so tedious.
Pattern is here - LOOP Baby Toy by Amy Herbst.
I used all organic yarn - the pink and blue are Blue Sky Alpaca Organic Cotton; the white is Knit Picks organic cotton.
Monday, April 8, 2013
ipad Mini Case
I made an ipad mini case for my husband's birthday. I used this tutorial from One Shabby Chick, but for the mini, I cut the pieces 7.5" x 10" (per thisblog). I didn't quilt the cover, just cut all the pieces 7.5x10. I tapered the lining pieces - the top was 7.5" wide, but the bottom tapered to 6.5" to reduce bulk from the batting. The flap was cut to 3.5"x4" (I first tried 3x4, but it seemed too small so I redid it). I added a pocket for the ear buds (pocket was made with two pieces of 7.5"X4" cotton with lightweight fusible interfacing between the two). Choosing fabric for DH was so not fun. I usually love choosing fabric for sewing projects, but here, my goal was to find something as plain as possible without being completely solid...


Tuesday, January 1, 2013
Pocket Dolls
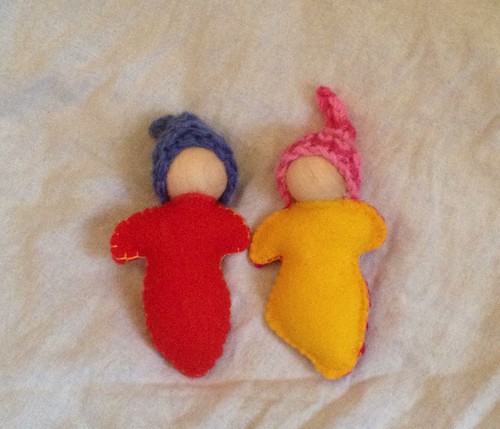
For our afternoon craft today, we made these adorable pocket dolls. The tutorial is here. For the hat, Y followed the directions exactly and it worked fine. For mine, with our 1" heads, I had to make three hats to get one to fit. My final hat is with Purewool worsted wool yarn on #8 DPNs - I did:
Cast on 12 sts
Rounds 1-4: Knit
Round 5: K2tog, K4, K2tog, K4
Round 6 and remaining even rounds: Knit
Round 7: K2tog, K3, K2tog, K3
Round 9: K2tog, K2, K2tog, K2
Round 11: K2tog, K1, K2tog, K1
Round 13: K2tog, K2tog
Round 15: K2tog, cut yarn, pull through hole and bring to inside hat
Cast on 12 sts
Rounds 1-4: Knit
Round 5: K2tog, K4, K2tog, K4
Round 6 and remaining even rounds: Knit
Round 7: K2tog, K3, K2tog, K3
Round 9: K2tog, K2, K2tog, K2
Round 11: K2tog, K1, K2tog, K1
Round 13: K2tog, K2tog
Round 15: K2tog, cut yarn, pull through hole and bring to inside hat
![]() |
| Pocket dolls - Y's on the left; Mine on the right |
Saturday, November 17, 2012
Rainbow Baby Quilt
This is a quilt I made for S when she was born. It is a crib-sized quilt - 34" x 50". The pattern is from Rita at Red Pepper Quilts - it is the Quilter's Palette Quilt Pattern. I loved working with this pattern - I love all of Rita's work and the pattern was very clear and easy to follow and I learned a bit about her techniques :)
The fabric is all organic from Cedar House Fabrics. It was harder than I expected to choose semi-matching fabrics. Some of the ones I ordered didn't really go and I had to order a few more. I'm happy with how the blocks turned out. The fabrics are a mix of brands - Daisy Janie, Monaluna, Cloud 9, and Birch. The backing is a thin organic flannel.
I'm very happy with the quilt! I love the colors.
Thursday, December 15, 2011
Newborn knitted hat and mittens
Finished a tiny set of newborn mittens and a hat. The patterns are from Louisa Harding's "Natural Knits for Babies and Moms". The yarn is Purewool 100% merino wool. I've made the hat a bunch of times so far and the mittens a few times, but this is the first time I was organized enough to make the i-cord to keep the mittens together!
Wednesday, December 14, 2011
Quick and Easy Baby Quilt #4
Just finished my fourth "Quick and Easy Baby Blanket" from "Last Minute Patchwork and Quilted Gifts" by Joelle Hoverson. It's listed as a 2-4 hour project, which is about right. The cutting always takes me a long time (this is my fourth one - here's one, here's one and the other I forgot to take a photo of) and at the end, you make little embroidered stitches every 4" to hold it together (see last photo) which takes a long time to first measure and mark the locations and then to do all the stitching (by machine, but still slow...)
The front fabric is Cloud 9 Organic cotton, backing is organic cotton (front and back from Organic Cotton Plus); batting is organic cotton and thread is organic thread from Near Sea Naturals, so it's truly a 100% organic blanket :)
This one measures 34" x 45" - I used up all the cloud fabric I had.
I honestly don't love the fabric, but it's sleepy-themed and organic and there's nothing else I can think to do with it other than a baby blanket, so it had to be done...
I know it needs to be ironed! But I'm afraid to do it until the vanishing marker marks vanish for fear that heat might cause them to set.
Sunday, October 30, 2011
Knitting Bag
I made this little knitting bag for Y's birthday (along with the tool belt). He picked the colors without knowing what I was making and I love how it turned out!
I used this tutorial. There's a little pocket inside for accessories. I think I'll put one of my stitch counters in the pocket for him. I'll give it to him with his needles and yarn inside.
Tuesday, October 25, 2011
Y's Birthday
For Y's birthday, I made him a tool belt using this pattern. I made it one inch longer and with canvas rather than thin fabric, since it will be for real tools rather than plastic ones. It doesn't have to be so perfectly useful, I know he'll love wearing it either way - the kids in Walker's books are wearing their toolbelts in all the photos and I don't see any tools sticking out :)
Tuesday, August 30, 2011
Baby Blanket
I made a little baby blanket for a friend who just had a baby.
The pattern is the "Quick and Easy Baby Blanket" from "Last Minute Patchwork and Quilted Gifts" by Joelle Hoverson. It's listed as a 2-4 hour project, which is about right. The cutting always takes me a long time (this is my third one - here's one and the other I forgot to take a photo of) and at the end, you make little embroidered stitches every 4" to hold it together (see last photo) which takes a long time to first measure and mark the locations and then to do all the stitching (by machine, but still slow...)
The front fabric is Harmony Art Sweet Jane organic sateen, backing is organic cotton (front and back from Organic Cotton Plus); batting is organic cotton and thread is organic thread from Near Sea Naturals, so it's truly a 100% organic blanket :) I love how it turned out - the fabric is so soft and the pattern is gentle and the colors are lovely - perfect for a baby blanket!
The blanket is 33"x53", quite a bit bigger than the recommendation, but I had that much fabric and the batting is that size, so it seemed better to use it than to have a thin scrap to save indefinitely...
I want to get some sweet gender-neutral baby fabric to make a few of these as standby gifts so I don't find myself doing blindstitch at 1 in the morning again (ah, I just realized that the name of the book is Last Minute Gifts, so I guess it makes sense that I was making this blanket at the last minute!)... I like that this gift is fun to make, practical, can be made fairly inexpensively if cheaper fabric is used, and is enough of a gift by itself (ie, I don't feel compelled to make several things when I give this blanket).
Saturday, August 6, 2011
Back Pain Hot Pad - Tutorial
This will be a VERY simple tutorial, mostly for my own benefit, so I can make these again :) This is a GREAT gift for anyone with back pain. It was a request from a family friend who, of course, has back pain. She saw something similar a few years ago and told me about it and that she regretted not buying it then, since she hasn't seen anything like it since, so I volunteered to make one and thus got the benefit of her detailed description and help in implementation!
This is filled with flax seeds and can be microwaved to heat the flax (which retains heat and cold well). Then you rest it between your back and bed or couch to relieve back pain.
Materials:
26" x 15" cotton or linen or favorite fabric
matching thread
about .5 kg flax seeds (hopefully not organic like I used...)
DIRECTIONS:
1. Wash and iron fabric.
2. Cut two pieces of fabric to 13" x 15" each. (One side is longer because once the pad is filled with flax, the horizontal side shortens a bit - guess how I know that?? LOL.)
3. Fold down one of the long sides on each piece of fabric 1/2 " to the wrong side and press.
4. With right sides facing, sew three sides together with a 1/2" seam. The side with the 1/2" fabric pressed down is the side that will not be sewed. Trim corners.
5. Turn right side out, poke out corners so they look square and press.
5. With a ruler and vanishing marker, mark 12 vertical lines evenly (the total fabric width will be about 14", so the lines are about 1.17" apart.
6. Sew along these lines, going back and forth at beginning and end.
7. Measure out 1.4 oz flax seeds and fill into the first column. Pin top so seeds don't fall out.
8. Continue #7 for remaining 11 columns.
9. Topstitch closed, going back and forth at beginning and end and making sure not to sew over seeds.
10. Cut loose threads.
11. Wait for vanishing marker to disappear and give to friend who will say, "Aaaaah, Thank You!!!"
Monday, October 25, 2010
Nature Bag
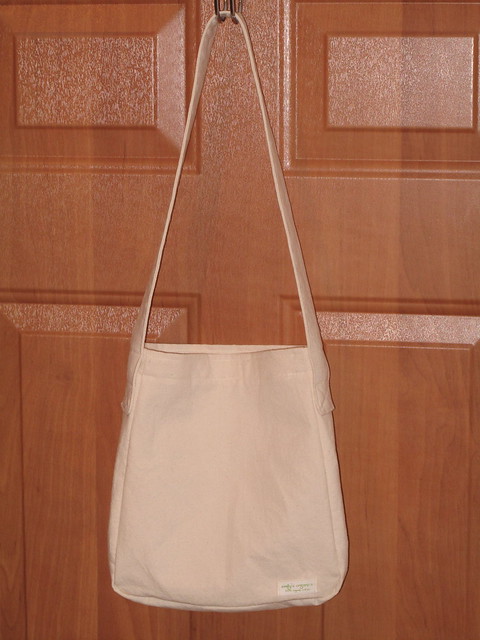
I made this little bag for Y last night (another birthday gift). The pattern is from "Linen, Wool, Cotton" by Akiko Mano; fabric is organic cotton from Organic Cotton Plus. I'm hoping Y will be as happy with his. He often asks me to hold his nature bag (which is like a standard canvas bag with two handles, but his is thin cotton) while we're in the forest because it's hard for him to balance and climb while holding onto the bag. This bag is designed as a messenger bag with only one strap, so it's to be worn over his neck. I'm adding some embroidery that I'll finish tonight - his name and some elements from the Cinderberry Stitches' precious Sweet & Spotty Needle Wallet.
The bag:

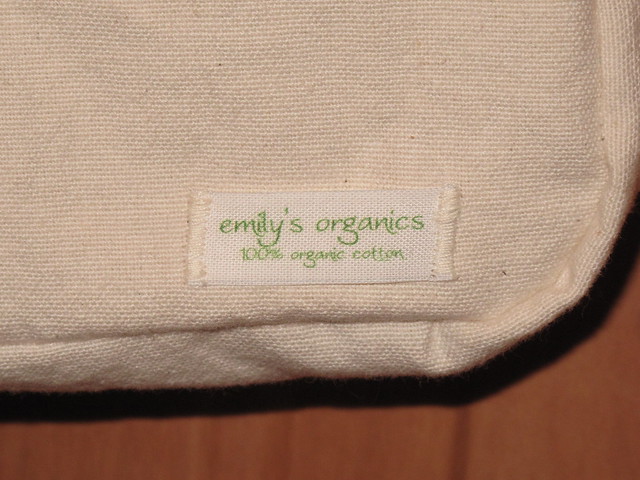
My (organic) "Emily's Organics" label that I got from greenbeanstrings on Etsy:

Finished photo (with embroidery) coming soon!
The bag:

My (organic) "Emily's Organics" label that I got from greenbeanstrings on Etsy:

Finished photo (with embroidery) coming soon!
Saturday, October 16, 2010
Stockmar Block Crayon Roll


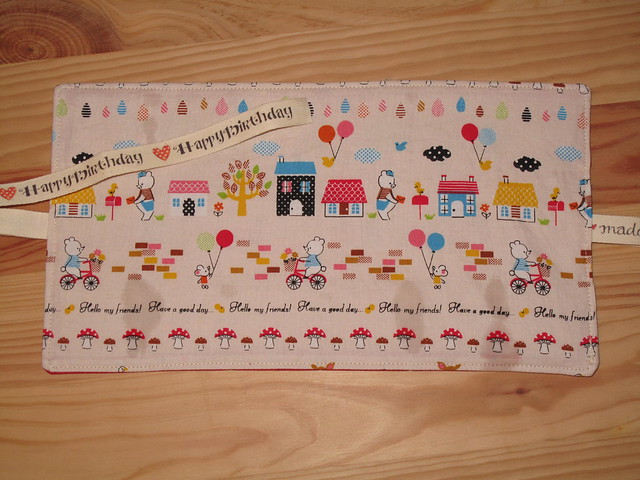
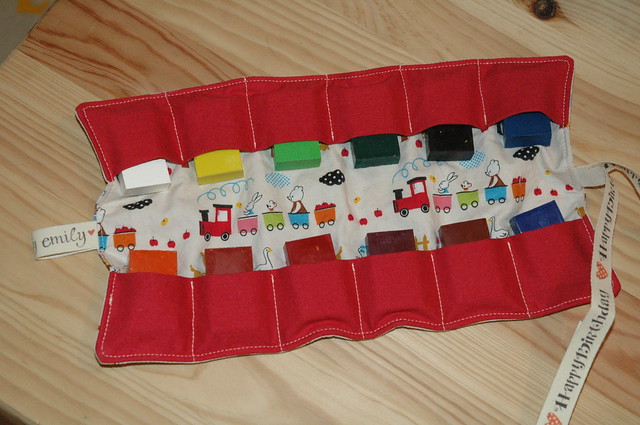
I just finished this crayon roll for Y's birthday. It can hold 12 Stockmar block crayons. Disregard the water marks - I used a water erasable pen for markings...
Measurements:
Outside fabric, inside fabric and interfacing fabric: 6.5" x 11.25"
Red fabric (two pieces): 4" x 11.25" (folded in half lengthwise before sewing to the inside fabric)
Ribbon: 20" (this time I used ribbon from Lillalotta).
Directions:
1. Cut all fabrics
2. Iron interfacing to wrong side of inside fabric
3. Fold crayon-holding fabric (my red fabric) in half lengthwise and iron. Pin in place (fold is toward the inside of the crayon roll). Make a vertical mark at 2.125" from the left edge, then four more markings every 1.75".
4. Stitch along markings, going back and forth a bit at beginning and end.
5. Fold ribbon in half with pattern on the INSIDE and topstitch to right side of inside fabric.
6. Pin ribbon to the inside fabric so you don't accidentally sew over it.
7. Place right side of outer fabric to right side of inner fabric and sew with 1/4" seam allowance, leaving a 3.5" hole for turning right side out (I left hole at short end on the side without the ribbon).
8. Trim corners and turn right side out.
9. Poke out corners with a knitting needle or similar, iron and topstitch 1/8" all around.
10. Insert crayons and enjoy!
Tuesday, October 5, 2010
Knitted Gnome

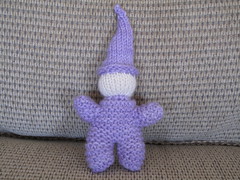
How cute is this little gnome!?!??! I used this free pattern - THANK YOU Tonya! It is such a fun pattern - just took me an afternoon (with interruptions) and Yoav stuffed it and sewed the arms on (you can't tell that he did it versus me - I was surprised he was able to do it so well with no tips!) The wool is Purewool. I definitely will be making more of these - it's easy, quick, fun to knit, and the finished product is adorable!!
Monday, August 30, 2010
Knit Hat for ME!

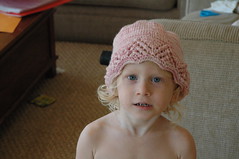
Just finished this hat for me. I love how it came out. I made one for a friend's daughter using the exact pattern recently (it's from Louisa Harding's "Hats, Gloves, Scarves" book). I modified the pattern for DPN needles and added an inch to the length, so it covers my ears and doesn't have a seam, so I like it much better for me than the original pattern. The yarn is Purewool 100% merino wool.
Monday, July 5, 2010
Baby Blanket


Just finished this little baby blanket. The pattern is from "Last Minute Patchwork and Quilted Gifts" by Joelle Hoverson. The front fabric is Harmony Art Silent Stumps (organic cotton), backing is 4.5oz organic flannel (front and back from Organic Cotton Plus); batting is organic cotton and thread is organic thread from Near Sea Naturals, so it's truly a 100% organic blanket :) I love how it turned out - the fabric is so soft and the pattern is gentle and the colors are lovely - perfect for a baby blanket!
The blanket is a lot harder than it looks because it has 99 (!) little satin stitch ovals to hold the batting in place. Next time I'll make them 4" apart instead of 3.25" so I don't have to do so many. It's important to start the ovals from the center of the blanket and smooth the blanket as you move outward or you get lumps of fabric between the ovals...
Another difficulty was that I made a mess cutting the flannel - I was listening to a podcast and ended up cutting the fabric three times and still didn't get it quite how I wanted, but the final size is fine. It ended up 31x38" (final blanket).
Yoav helped pick out the fabric, although he actually preferred Harmony Art Whispering Grass, which I think is too shimmery - I actually have no idea what to do with it, but that's another story... He also helped cut the fabric (not while I was listening to the podcast).
Wednesday, June 23, 2010
Flaxseed Boo Boo Bag
Just made a little flaxseed "Boo Boo Bag". I love it. I've been wanting to make one of these for a long time. I love the feel of the flax and the size seems perfect. It's 4.5"x4.5" finished - a little bigger than the beanbags so we don't get confused. The fabric is "Sunbonnet Sue" linen/cotton blend. The fabric is so sweet - the fabric alone is enough to cheer you up - I got it for an apron I made my niece. Sunbonnet Sue is a classic quilt block that originated in the late 1800s. I once saw a beautiful Sunbonnet Sue quilt on exhibit in NYC. You can read more about her here.
A flaxseed Boo Boo Bag can be stored in the frezer and used like an ice pack. Flax lasts a long time and has high oil content so it holds the cold longer than other grains (and doesn't drip like the actual ice cube Boo Boo Bag Yoav made recently LOL). For reference, these are filled with 4oz flax.
Subscribe to:
Posts (Atom)